So Rhiannon wanted a shelves and drawers thing to go under the stairs for her birthday, and her colour scheme is black. I agreed to make it, but I was not going to paint it, as I am in love with the patterns of the grain in any wood that I work with. However, while browsing Richard Maguire’s website, http://www.theenglishwoodworker.com, my eye was caught by the design of his sidetable which has an undercarriage that is blackened via a process called “ebonising”.
Googling the internet showed that this process, which is several hundred years old, depends on the reaction between iron and tannin, shown by the black stain found around nails in oak, a wood rich in tannin. As it simply stains the wood, I hoped that it would still leave the grain visible, satisfying both Rhiannon and myself.
Many woods do not contain enough tannin for a satisfactory result, so the traditional recipe involves painting on a tannin solution followed by painting on a solution containing iron. The tannin solution is prepared by boiling up teabags and allowing them to stew, while the iron solution is made by dissolving steel wool in vinegar for a period of a week or more.
I experimented with this recipe, obtaining variable results, but then the inner chemist took over, and I ordered some tannic acid powder and ferrous sulphate crystals. Making up solutions from these with known concentrations, I embarked on a series of experiments which showed that it was very easy to ebonise wood after several coats of the two solutions.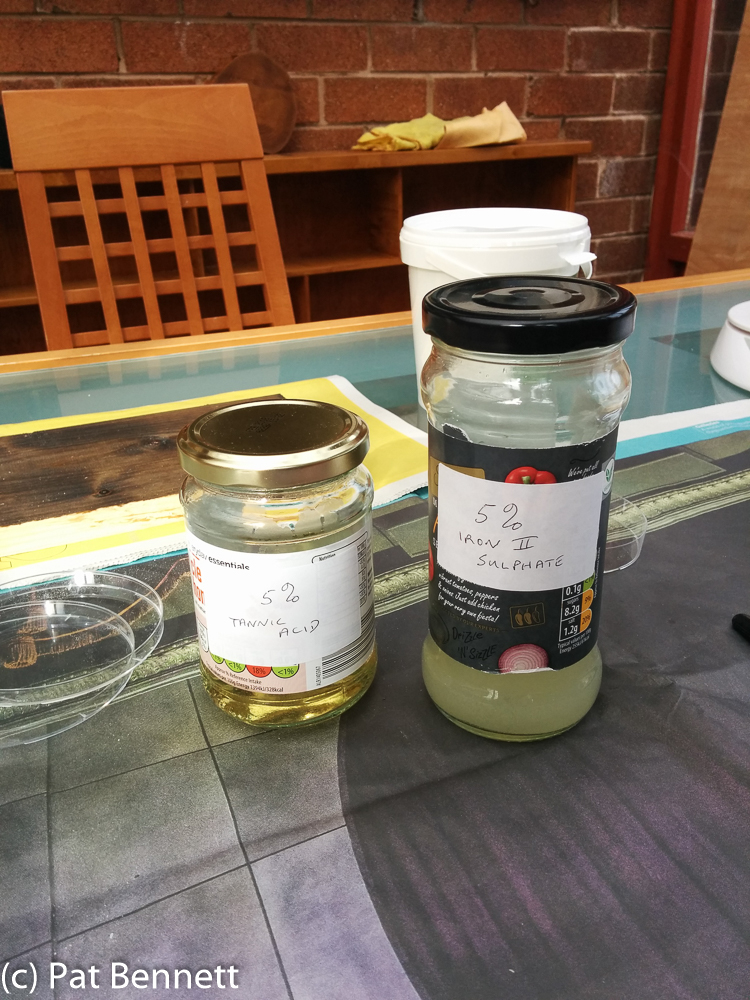
Usually, the final colour had a bluish-purple tinge to it, but Rhiannon approved, so the SDT (shelves and drawers thing) became my first piece to be ebonised.
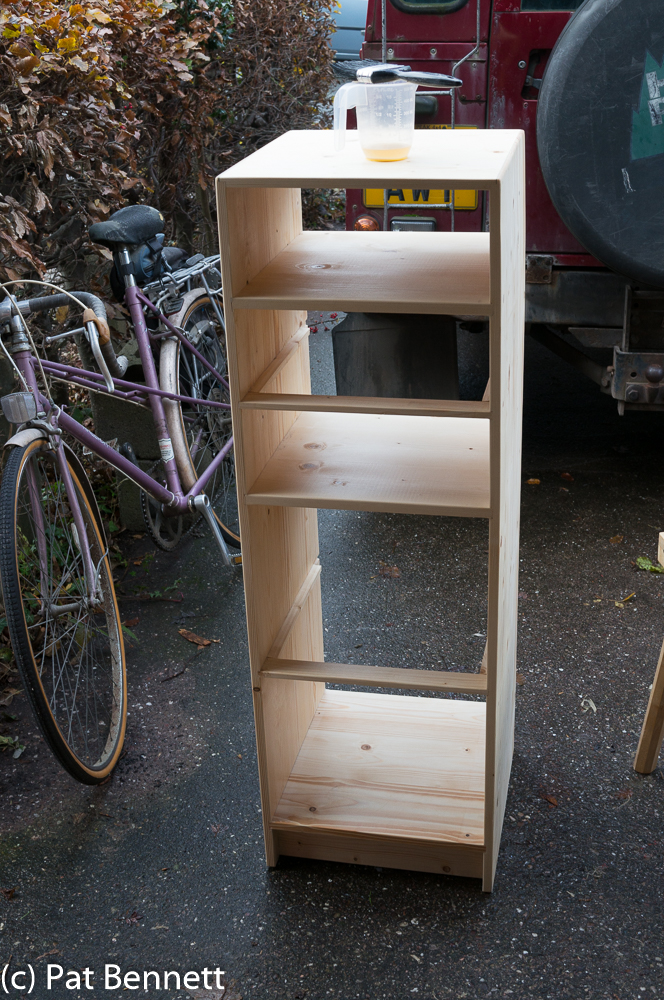
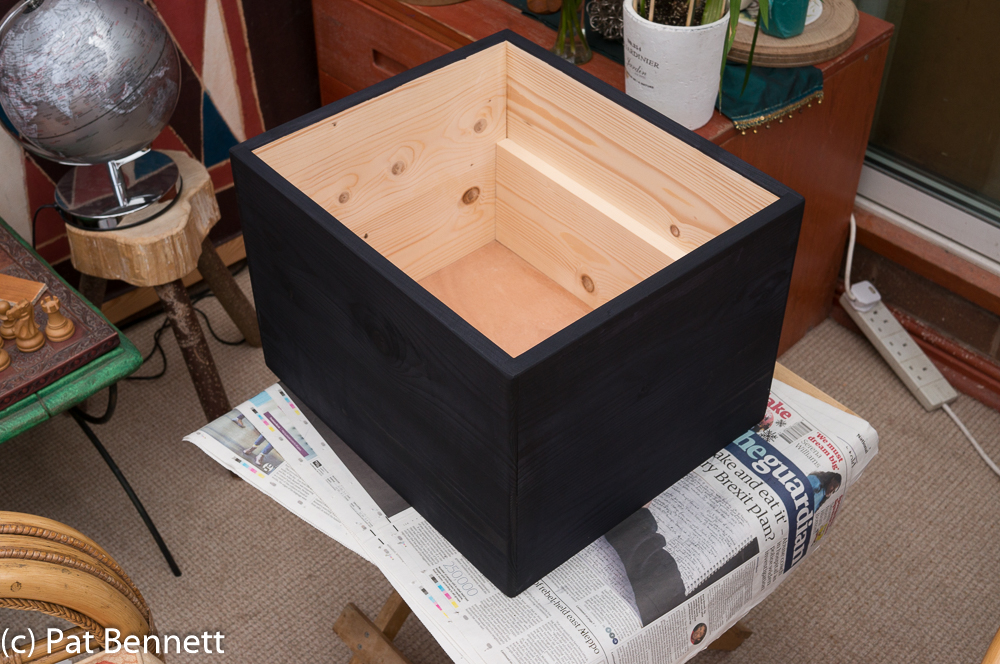
This, minus the drawers, was the SDT awaiting the finish, and I was happy with the joinery after planing and sanding everything smooth. I brushed on the tannin acid solution and left it to soak in for an hour, then started brushing on the ferrous sulphate solution.
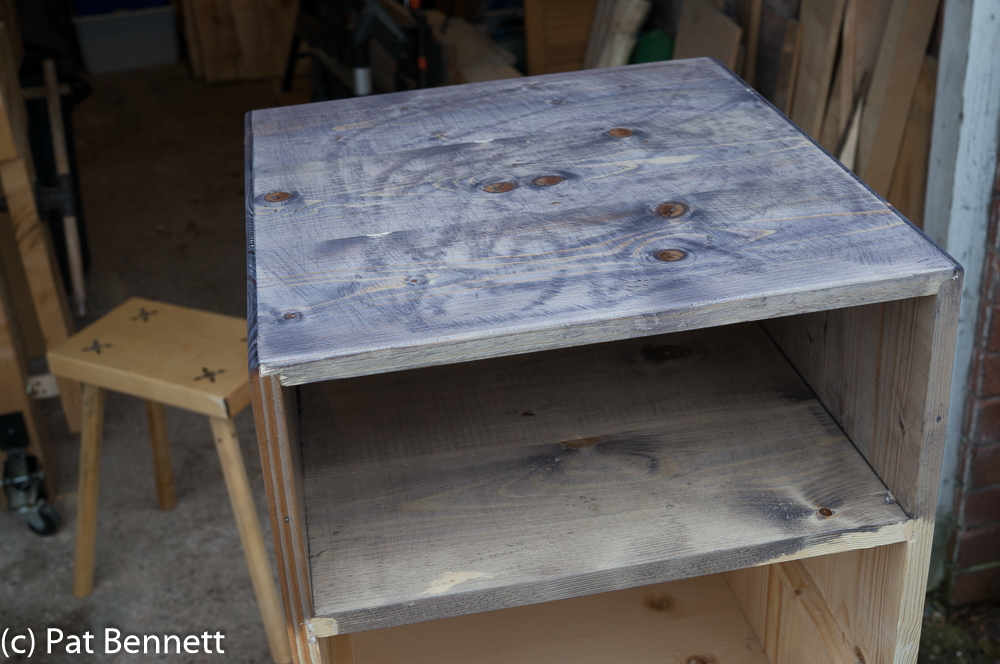
The tannic acid wash gave very little colour change, but this is a few seconds after starting to brush on the iron sulphate solution. At this point, I was wishing that I hadn’t tried this ebonising thing, and was wondering how easy it would be to sand it off. However, a few hours later it had darkened considerably, as shown here, and a second application produced the usual dark black with a bluish tinge. 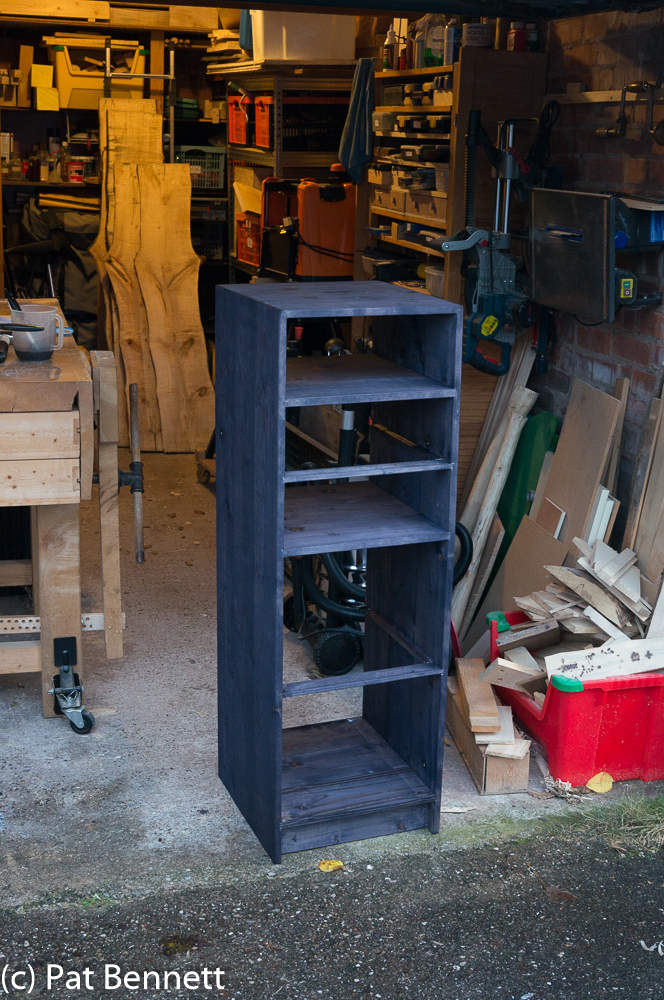 I left it overnight to dry, and the next day I applied the final finish of danish oil. This immediately changed the colour to a more intense black, and the blue tinge was hardly detectable.
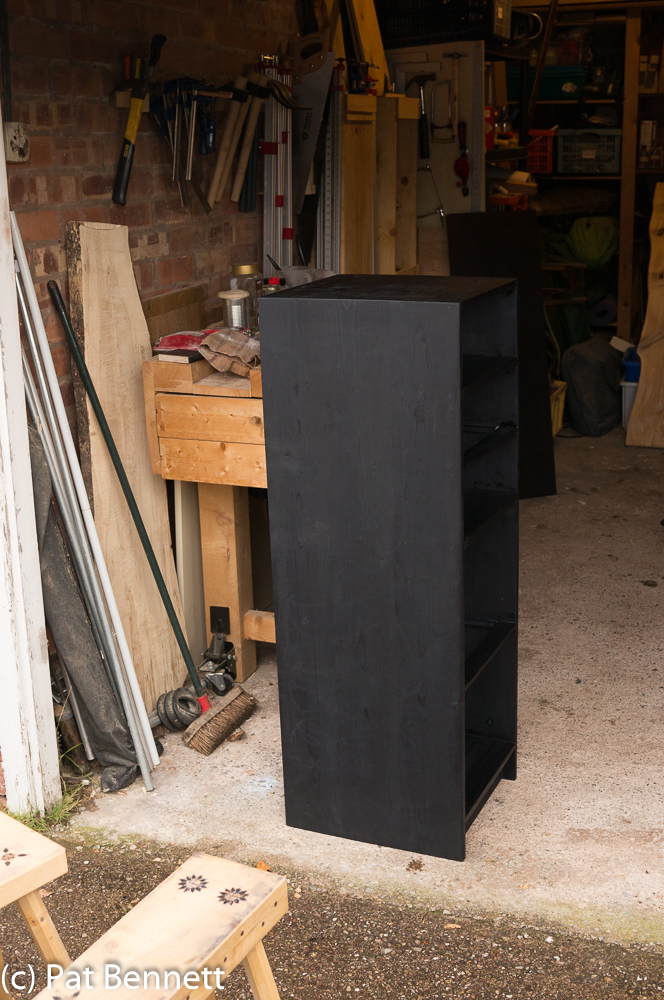 Satisfied with this, I ebonised the back of the SDT and the outside of the two drawers with two applications of the tannin and ferrous sulphate solution, and finished them with danish oil as well.
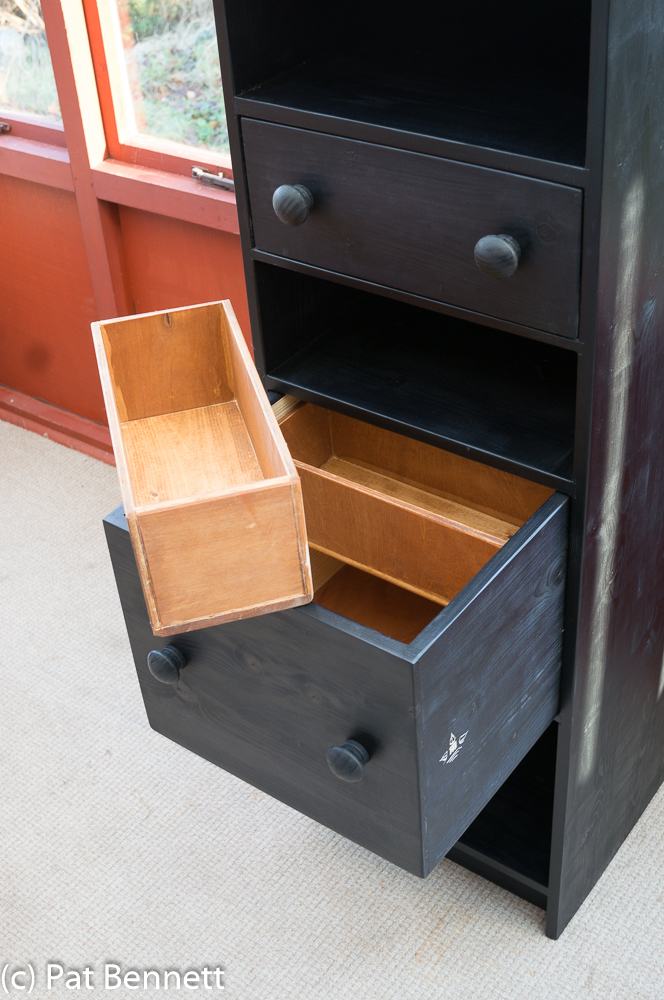
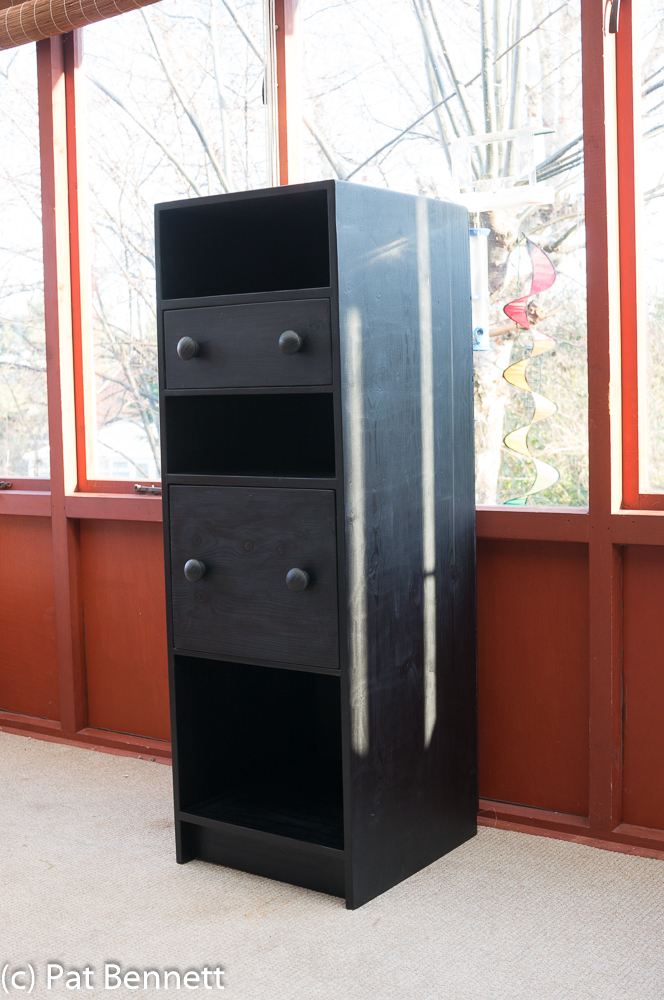
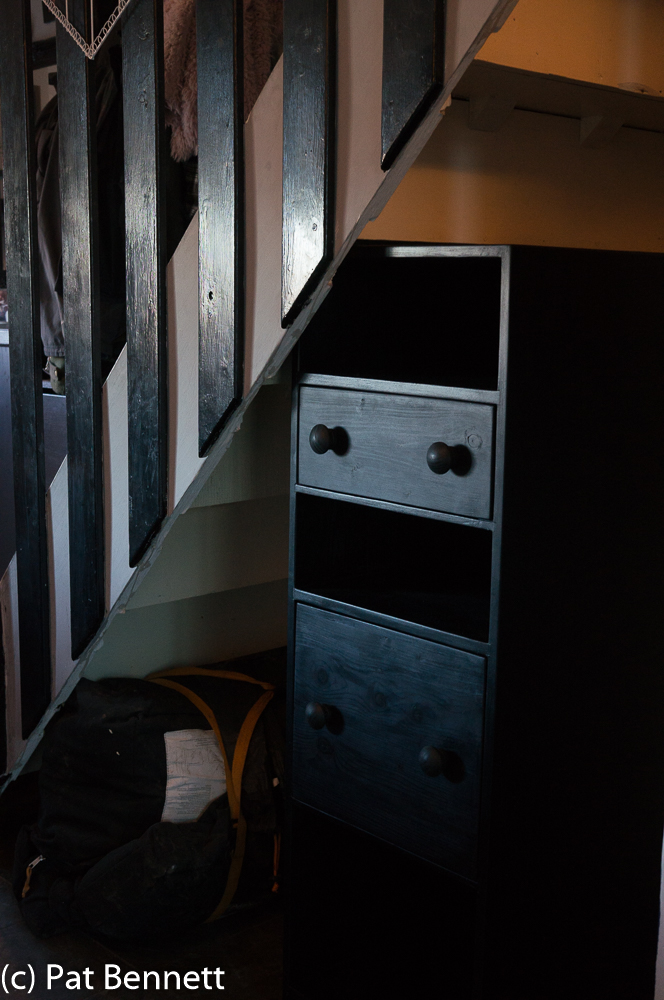
Here is the completed SDT, together with sunlight, in our conservatory.
I delivered the piece to the client, who seemed pleased, and here it is in situ.
There are a number of blogs by woodworkers around the net, describing how they have investigated the best way of using this technique, and the suitability of different types of wood. Conclusions have been drawn, some of which I do not believe are correct, as they vary. I think the chemical reactions by which the black substance is formed is very complex, and I am going to throw another factor into the mix which I do not think has been remarked upon previously.
I believe that as the two solutions get older, the time taken for the wood to darken gets less. I think that this is true, due to my observations over the several days that I ebonised the SDT, then the back, then the two drawers. If this is indeed true, I have a possible explanation, from my background in chemistry.
Here goes – iron compounds can exist in two forms, ferrous and ferric (different valencies – look it up if you must). Ferrous compounds are less stable, and tend to react with oxygen in the air and become the equivalent ferric compound.
Perhaps it is ferric compounds which do the ebonising reaction with tannin, and ferrous compounds are incapable of doing so. This would explain the comparative slowness of reaction with freshly made up ferrous sulphate solution – it would have to react with oxygen in the air before it could react with the tannin. After a few days, most of the ferrous sulphate would have been oxidised to ferric sulphate, hence the speed of the colour change when doing the drawers.
There are too many other interesting things to do for me to take this any further just now – next time I want to ebonise a project, I’ll check out whether my observations are repeatable, but the important thing to me is that it works!
 The ironmongery is all I shall take home – hopefully, it will not send my luggage allowance over the limit – and the plank of wood, technically called the “chop”, will be replaced by a brand new piece of sycamore from our wood. Oh, and I’ve bought Pete a Workmate for Christmas. Perhaps Bryn might get some use from it …